Fussing With Images
A flame war recently erupted in an old WordPress feature thread on the topic of integrating WebP support. Like all such "discussions", the passions were primarily fueled by confusion and misinformation, but what caught my eye here — aside from the explosion of notifications — was that a leading member of Core Media was one of the voices amplifying nonsense.
This serves as a good reminder that image formats are complicated.
Normal people might not even be aware that images come in different formats, and even most web professionals have only the vaguest of understandings of what makes one format different than another.
When rebuilding our own web site, we paid a lot of attention to the images. Compared to HTML, CSS, and Javascript, images are downright huge. Minimizing that hugeness while maintaining the visual quality takes a lot of fiddling, but is effort well-spent.
Bits and Bytes and Maps
Before we can talk about more advanced image formats, we need to take a minute to explain how color-as-data works at a basic level.
The smallest unit of data in computing is the "bit", a binary, yes/no, on/off flag represented by a 1 or a 0.
The XBM image format, supporting only black or white pixels, is able to represent its data using a simple map of bits, or a Bitmap.
Greyscale is a little more complicated, because it requires scale. But as it turns out, it doesn't require very much scale, as humans, like all mammals, have pretty limited color vision.
Here, a "byte", rather than a "bit", does the trick. A byte is made up of 8 bits and covers the decimal range 0–255 (inclusive) for a total of 256 distinct values. If you write a lot of HTML colors, you're probably more familiar with this range in the hexadecimal form, 00-FF.
Greyscale "pix-maps" store each pixel in a simple map of bytes, with 0 being black, and 255 being white, and everything else being some amount of grey. That more than covers the range people can see.

In fact, at this scale, if we were to try to label the points along the gradient, it would look like this:
In other words, 256 is plenty.
Color "pix-maps" actually work the same way, but require three bytes for each pixel: one for red, one for green, and one for blue. Collectively, these three values (RGB) can represent a total of 16,777,216 distinct colors.

As it happens, this is exactly how our eyes evolved to work. RGB isn't arbitrary so much as human-centric.
Beyond color, there's also transparency, which is usually recorded as a fourth byte. This is called RGBA, with the "A" meaning "Alpha(-transparency)".
Network Use
All images are ultimately collections of pixels.
The bitmaps and pix-maps mentioned in the previous section go about this without pretension, storing information about each and every pixel in a straightforward map. It gets the job done, but all that verbosity comes at the cost of storage size, making such formats ill-suited for use in networking contexts, e.g. the Web.
Because of this, the HTML <img> tag first launched with support for a smarter format, capable of representing pixel data in a fraction of the bytes required by color pix-maps: the venerable GIF!
The true magic of the GIF — as well as later formats like PNG — is its use of an "indexed" color table. Rather than storing the full RGB values for each pixel, GIFs build up a table of all the colors in a given image — up to 256 of them — and link each pixel back to an entry in that table, effectively dropping the per-pixel size from 24 bits down to 8 bits.
Unfortunately, that same indexed color table making GIFs suitable for dial-up makes them wholly unsuited for representing anything approaching photo-realism. To clear the way for porn cat blogs, it was necessary to attack the problem another way.
This is where the Joint Photographic Experts Group and their eponymous JPEG image format enter the picture.
Unlike bitmaps, pix-maps, and GIFs, JPEGs don't really care much about the integrity of individual pixels. In a sense, they don't even think in terms of pixels at all, but in frequencies. By discarding or averaging away the sorts of small, high-frequency image components humans aren't particularly good at seeing anyway, JPEGs can greatly simplify the storage problem, while honoring the image's original spirit.
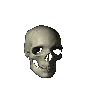
This strategy works extremely well for photographic sources, but the lossiness and color drift leave JPEG ill-suited for sources with sharp, solid colors, like charts, logos, and illustrations.
PNG, a little late to the game, was seemingly invented to do everything. It supports lossless color representation, like bitmaps, pix-maps, and GIFs, but also supports lossy compression, allowing for significant size reduction. It supports indexed color tables like GIFs, but also RGB maps like JPEGs. It supports RGBA maps, allowing for variable transparency, and can even handle animation, though browser support for animated PNGs never really caught on.
Before we move on, though, it is worth giving SVG a shout-out, as they're actually more common than GIF in the modern era, and are slowly replacing PNG for many use cases.
Unlike every other format mentioned in this article, SVGs are not binary files; they are text files containing XML markup. Rather than representing images as discrete pixels, SVGs define a series of shapes and coordinates. Web browsers render SVG "images" at runtime in much the same way they render web pages, scaling each shape to the specified width and height.
That scale is the key to its success. Because SVGs operate on math rather than explicit data points, a given file can be rendered at any size with equal quality, be it small like a postage stamp or big like a billboard. This makes them particularly useful in "responsive" web contexts, as the same physical image can be served to visitors regardless of their display density or screen resolution.
Using the "Right" Format
At present, if you want to use an image on the web, you need to save it as either a GIF, JPEG, PNG, or SVG. And while we didn't mention it earlier, you need to use an RGB or greyscale color space (CMYK, for example, will look funny in a browser).
It is worth reiterating that no single format is perfect. Every single one of them, even GIF, is the best choice sometimes and the worst choice other times.
While there will be some exceptions, you can usually do right by following these guidelines:
- If the source image is a (true) vector, save it as an SVG.
- If the image requires animation, save it as a GIF, unless it looks terrible reduced to 256 colors, in which case you actually need to make a video, not an image. Wrong article! Haha.
- If the image is a photograph, save it as a JPEG, unless it contains transparent regions, in which case you have to use PNG.
- Most everything else can be a PNG, though it is often worth comparing the PNG against a JPEG saved with chroma-subsampling disabled (to help preserve the colors). For images with more than 256 colors, it is often a toss-up as to which format can record the same data in the fewest bytes.
Compressing the "Right" Way
While not yet mentioned, each of these formats supports variable levels of compression, both lossy and lossless. Choosing the right image format means little if you don't save them with appropriate settings.
There are many programs aimed at lossily re-compressing images, but they're meant as a band-aid for images that weren't saved correctly in the first place. You can use them if you want and ignore this section, but it is better to simply save the image correctly at the outset.
Tip
Nowadays you can just use Flaca for all your JPEG/GIF/PNG lossless recompression needs.
GIF
For GIFs, you really just need to make sure the image is using the appropriate number of colors. Reduce it if you can.
For animated GIFs, you can play around with frame interlacing options, but generally that usually just makes the output bigger.
SVG
For SVGs, this process is as easy as running the source code through SVGO or the web-based SVGOMG.
In most cases, you can safely enable all of the compression settings except the viewBox one (browsers use viewBox for a number of rendering tasks, so it is good to keep that information).
After compression, it is worth manually reviewing the source code in a text editor. Programs like Inkscape will write a lot of metadata-type attributes that don't affect the render; you can delete these (if SVGO didn't) to save additional space.
JPEG
The single biggest impactor on a JPEG's file size is its quality scaler, which can be set when saving the file in an editor. There is no one-size-fits-all value, but start with 85% and see how it goes. Some images will look A-OK with qualities as low as 50-60%, while others might need as much as 95%.
Take your time, save a few versions, and pick the smallest file that looks good to you.
JPEGs are pretty well optimized by default, but MozJPEG comes with a few tricks that can further reduce an image's file size without affecting its quality.
To make use of that, pass the image through jpegtran (the MozJPEG version, not the libjpeg version!), using the following settings:
# Make a lighter copy of the image.
jpegtran -copy none -optimize -progressive \
    /path/to/image.jpg \
    -outfile /path/to/image2.jpg

# Replace the original with the MozJPEG copy.
mv /path/to/image2.jpg /path/to/image.jpg
The MozJPEG step can usually reduce a JPEG image size by 1-5%. Nothing crazy, but every bit helps!
PNG
Image editors want to get you files quickly, so they won't actually apply very much compression. Select the strongest compression setting offered when saving the file, but know this only gets you part way.
To truly minimize the file size — without distorting the quality of the image — you need to run the image through oxipng, using the following command:
oxipng -o 3 -s -a -i 0 --fix /path/to/image.png
Oxipng is fantastic, but you can usually shave off a few more bytes by passing the image through zopflipng afterward.
Zopflipng is comparatively slow and CPU-intensive, but worth the effort. Here's the command to use:
# Note: the image path is repeated because Zopfli wants both an input
# and an output, but they're both the same path in this case.
zopflipng -m -y /path/to/image.png /path/to/image.png
The combination of oxipng and zopflipng can usually reduce a PNG image size by 25-35% or more. Not too shabby!
The Next Generation
The old-timers have served us well for decades, and aren't going anywhere anytime soon, but there are a few relative newcomers worth mentioning, namely WebP and AVIF.
Both formats, as well as their eventual successors, are based largely on insights gained from modern video codecs, the magic that makes possible HD video streaming.
WebP, based on the VPN video codec, comes in several different flavors, including (mostly) lossless, lossy, and multi-frame (i.e. animation). The lossless mode can (usually) represent PNG-like data with about 10-20% fewer bytes than a PNG. The lossy mode can (usually) represent JPEG-like data using 40-50% fewer bytes than a JPEG. The multi-frame mode can represent GIF-like data, though depending on the source, GIF might actually do it better.
When WebP works, it works very well, but unfortunately it is cumbersome to use, and people frequently apply the wrong settings, resulting in poor quality or poor compression or both. There are also a handful of use cases in which WebP simply never produces acceptable results, including low-color animated GIFs, JPEGs with chroma-subsampling disabled, and PNGs leveraging indexed color tables.
AVIF, based on the AV1 video codec, is on the bleeding edge, capable of rendering both JPEG-like and PNG-like data, often with significant reductions in file size, particularly with large images. At its best, AVIF can be as little as half the size of a comparable WebP, and as little as a quarter of the size of the original JPEG/PNG source.
While damn impressive, there are a couple areas where AVIF is not particularly strong. Small images, like thumbnails, don't give it enough room to really fly, and it will often under-perform compared to WebP in such cases. Indexed-color PNGs also pose a significant challenge, and will usually come in smaller than an AVIF copy.
Support, or the Lack of It
Both WebP and AVIF — though more so AVIF — suffer from a current lack of broad browser compatibility. Until the situation changes, these formats are best used as secondary, progressive enhancements to the more established JPEG/PNG/GIF formats.
The simplest way to do this on the web is by using the <picture> element, like:
<picture>
    <source srcset="image.avif" type="image/avif">
    <source srcset="image.webp" type="image/webp">
    <img src="image.jpeg" alt="My Image">
</picture>
Browsers will pick the first supported image source and ignore the rest, so stack them best to worst and let God sort 'em out.
Conversion
Most image editors lack native support for these newer formats, so you have to use specialized tools to convert your standard sources to the newer formats.
Tip
Nowadays you can just use Refract to convert JPEG/PNG sources to WebP, AVIF, and/or JPEG-XL in a guided, fuss-free manner.
At the moment, I prefer using cavif to handle AVIF conversion. Like JPEG, quality is the main driver of file size, and the "right" quality depends wholly on the content of a particular image, so it is best to save several versions and visually compare them to choose the best one.
Command-wise, just type:
cavif -s 1 -Q 60 -f /path/to/image.jpg -o /path/to/image.avif
The quality is controlled by the -Q option. I usually start with 60 and move it up or down depending on how the output looks. The higher the number, the better the image should look, but the bigger the file size will be.
WebP is a bit more complicated, as different source formats require different programs or different settings. You can get the official binaries here.
For GIFs, animated or otherwise, run:
gif2webp -mt /path/to/image.gif -o /path/to/image.webp
For PNGs, try the lossless mode, running:
cwebp -lossless -z 9 -mt /path/to/image.png -o /path/to/image.webp
For JPEGs, do this instead:
cwebp -jpeg_like -mt /path/to/image.jpg -o /path/to/image.webp
It is worth noting, WebP's longopts use a single dash rather than the more traditional double-dash, and as a result, you must keep shortopts separated. The ordering also matters, so just type the command as written above for best results. Haha.
Wrapping Up
Our own site contains a mixture of GIF, JPEG, PNG, and SVG images. We use <picture> elements to hold WebP and/or AVIF copies when those copies make sense, but don't when they don't.
On the whole, the next-generation formats work quite well, but there are a few cases where they come up short, including on this very page:
- The background image in our header doesn't render quite right in AVIF format, so only JPEG and WebP copies are served.
- AVIF added a little blurring of its own to the JPEG color drift image, so only PNG and WebP are served.
The image used for the illegibly small hexadecimal gradient range in the Bits and Bytes and Maps section also posed some problems.
The SVG we ended up settling on is a gratuitously large 99KiB because of the large number of paths. Brotli encoding brings the transfer size down to a much more reasonable 7.7KiB, but in cases like this — a complex vector being displayed at a small, fixed size — it is usually better to use a raster format like PNG instead.
We tried that here — and the PNG was indeed much smaller — but without the benefits of sub-pixel antialiasing, all hints of detail were blurred away.
Before nuking the file, though, we ran some test conversions for fun. In this case, the next-gen formats were both a bust! WebP ended up increasing the file size, while AVIF refused to generate anything at all because the height was too small. (AVIF requires minimum dimensions of 16px.)
Long story short, there are no magic bullets. The road to optimization takes some manual effort.