Announcing Refract GTK!
We have been writing about images a lot lately. See e.g. Fussing with Images, More Fussing With Images, and JPEG XL, the New Image Format Nobody Wanted or Needed.
Sorry if this is starting to feel a bit repetitive.
But images continue to be… everywhere.
Anyhoo, a while back, frustrated with the impossible task of accurately converting images for this and other sites into next-generation formats like WebP, AVIF, and JPEG XL, we put together a simple CLI tool called Refract.
Today, we are happy to announce that Refract is now a full-blown graphical GTK application! (And in related news, the CLI version is dead. Haha.)
Viewer and Encoder
The guided conversion logic of Refract CLI greatly simplified the tedious task of finding the "right" quality settings for every image/format combination, but still required manually opening each candidate image in a browser or other program to see what it looked like.
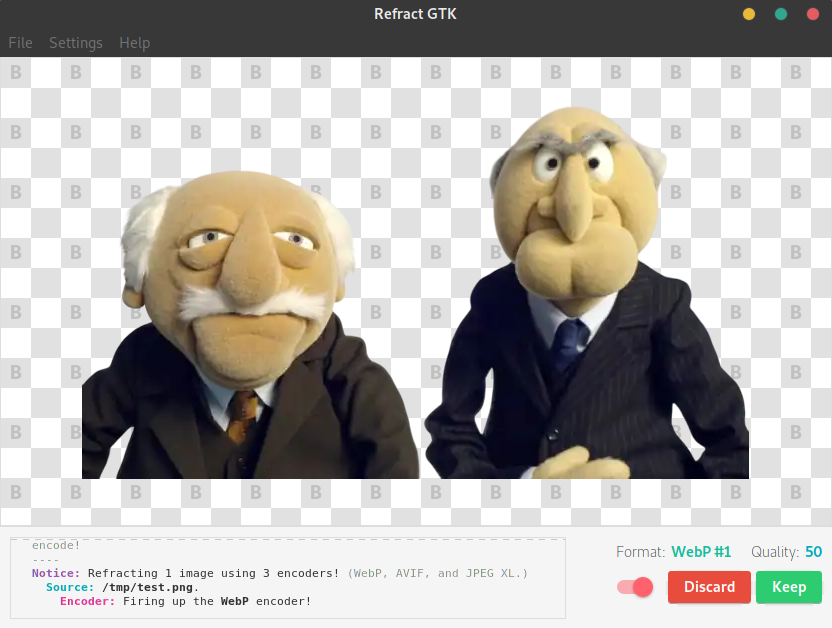
Refract GTK removes that step, providing a built-in image viewer, allowing you to preview the source and candidate images — at their native resolutions — and provide feedback all in one place.
It looks something like this:

As before, Refract will generate candidate images at various qualities, asking you at each step whether or not it looks good. If it does, press Keep and it will see if it can lower the quality; if it doesn't, press Discard and it will raise the quality.
Each answer, regardless of positivity, effectively halves the remaining range, allowing Refract to find the best "acceptable" image — whatever "acceptable" means to you — in about 5-10 steps instead of 100+.
If and when it finds that best image, a file dialogue pops up so you can save it wherever you want.
Install It!
Refract is written for x86-64 Linux systems with GTK. If you're on a Debian-based distribution (or something flexible like Arch Linux), you can grab the latest pre-built .deb package from the release page and install it the usual way.
If you're on some other 64-bit Unix system, you may well be able to build Refract from source, although you'll need a number of extra build dependencies to do so. Take a look at the Installation section for instructions.
If you'd like to check out the source or read more about the program, visit the Github repo.